


Step-by-Step Guide to Installing a Slim Pedestal Basin: Enhance Your Bathroom Elegance
Release time:
2026-10-12
Step-by-Step Guide to Installing a Slim Pedestal Basin In the world of modern bathroom design, a slim pedestal basin stands out as an elegant and space-efficient choice. Ideal for smaller bathrooms or powder rooms, this type of basin not only saves space but also adds a touch of sophistication to your décor. In this comprehensive guide, we will walk you through the entire installation process with

Step-by-Step Guide to Installing a Slim Pedestal Basin
In the world of modern bathroom design, a slim pedestal basin stands out as an elegant and space-efficient choice. Ideal for smaller bathrooms or powder rooms, this type of basin not only saves space but also adds a touch of sophistication to your décor. In this comprehensive guide, we will walk you through the entire installation process with clear instructions and helpful tips, ensuring you can achieve a professional-looking result.
Table of Contents
- 1. Understanding the Slim Pedestal Basin
- 2. Tools and Materials Needed for Installation
- 3. Preparing the Installation Area
- 4. Step-by-Step Installation Process
- 5. Connecting the Plumbing
- 6. Securing the Basin and Finishing Touches
- 7. Maintenance Tips for Your Slim Pedestal Basin
- 8. FAQs About Installing a Slim Pedestal Basin
- 9. Conclusion
1. Understanding the Slim Pedestal Basin
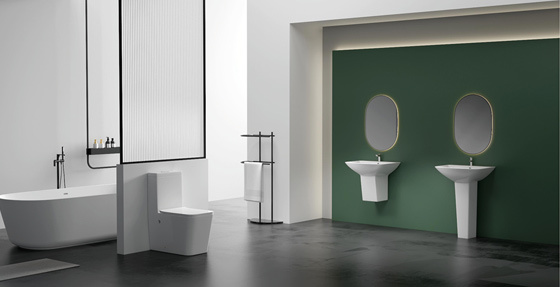
A slim pedestal basin is designed with a sleek profile that provides a contemporary look while maximizing floor space. These basins typically have a narrow basin and a single pedestal that supports the sink and conceals plumbing. They are known for their minimalist appeal and versatility, making them a popular choice in modern bathroom designs.
2. Tools and Materials Needed for Installation
Before starting your installation, gather all necessary tools and materials to ensure a smooth process. Here’s a list of what you will need:
- Adjustable wrench
- Plumber’s tape
- Screwdriver (flathead and Phillips)
- Level
- Drill with masonry bit (if needed)
- Pencil for marking
- Measuring tape
- Sponge and bucket (for cleanup)
- Silicone caulk (for sealing)
- Plumbing fittings and water supply lines (usually included with the basin)
3. Preparing the Installation Area
Preparation is key to a successful installation. Begin by ensuring that the installation area is clean and free of debris. Consider the following steps:
- Measure the Space: Use a measuring tape to confirm that your slim pedestal basin will fit in the intended location.
- Check Existing Plumbing: Make sure the water supply and drain lines are accessible. If not, you may need to adjust their placement.
- Mark the Wall: Use a pencil to mark where the basin will be mounted on the wall. Ensure it's at a comfortable height, typically between 30-34 inches from the floor.
4. Step-by-Step Installation Process
Now that you've prepared the area, it's time to install your slim pedestal basin. Follow these steps closely:
4.1. Positioning the Basin
Carefully lift the basin and position it against the wall at your marked height. Use a level to ensure it is straight and make any necessary adjustments.
4.2. Marking Mounting Holes
With the basin held in place, mark the positions of the mounting holes on the wall. Remove the basin and drill holes in the marked locations. If you hit tile or a tough surface, use a masonry drill bit.
4.3. Securing the Mounting Bracket
Install the mounting bracket (if provided) to the wall using screws. Ensure it's secure and level, as this will support the weight of the basin.
4.4. Installing the Pedestal
Next, position the pedestal base in place. Ensure it is flush against the wall and floor, making adjustments as necessary.
4.5. Attaching the Basin to the Pedestal
Carefully lift the basin back onto the pedestal. Align it properly and secure it per the manufacturer’s instructions, usually with screws or brackets.
5. Connecting the Plumbing
After securing the basin and pedestal, it’s time to connect the plumbing:
- Connecting the Drain: Install the drain assembly according to the manufacturer's instructions. Ensure all connections are tight to prevent leaks.
- Connecting the Water Supply: Attach the water supply lines to the faucet. Make sure to use plumber's tape on the threads to ensure a watertight seal.
6. Securing the Basin and Finishing Touches
To ensure that your slim pedestal basin is securely installed, follow these final steps:
6.1. Sealing the Edges
Apply silicone caulk around the edges of the basin where it meets the wall and the pedestal. This helps to prevent any water damage and gives a finished look.
6.2. Final Inspection
Double-check all connections, ensure the basin is level, and clean up any excess caulk or debris.
7. Maintenance Tips for Your Slim Pedestal Basin
Maintaining a slim pedestal basin is relatively straightforward. Here are some tips to keep it looking pristine:
- Regular Cleaning: Use a gentle cleaner to wipe down the basin and pedestal to prevent soap scum and water marks.
- Check for Leaks: Regularly inspect connections to ensure there are no leaks. Promptly address any issues to avoid water damage.
- Use Mild Cleaning Products: Avoid abrasive cleaners that can scratch the surface of your basin.
8. FAQs About Installing a Slim Pedestal Basin
8.1. How long does it take to install a slim pedestal basin?
The installation process typically takes about 2 to 4 hours, depending on your plumbing readiness and skill level.
8.2. Do I need professional help for the installation?
If you are comfortable with basic plumbing and DIY tasks, you can install it yourself. However, if you are unsure, hiring a professional can ensure a proper installation.
8.3. Can a slim pedestal basin be used in small bathrooms?
Absolutely! Slim pedestal basins are designed specifically for small spaces, making them an excellent choice for compact bathrooms or powder rooms.
8.4. What should I do if I encounter plumbing issues during installation?
If you run into plumbing issues, it’s best to consult with a professional plumber to avoid further complications.
8.5. How do I care for the faucet connected to the slim pedestal basin?
Regularly clean the faucet to keep it free from mineral buildup and leaks. Ensure that the connections are tight to prevent drips.
9. Conclusion
Installing a slim pedestal basin can dramatically enhance your bathroom's style and functionality. By following this step-by-step guide, you can achieve a professional-looking installation that elevates your space. Remember to prepare adequately, take your time during the installation process, and maintain your basin for years of use and beauty. With the right tools and a little patience, you can transform your bathroom with this elegant addition.
Related news
Introduction to the selection points of children's toilets
Children's toilets, the whole size and adult toilets are different, the main thing is width and height.
2025-01-09
What is the difference between a split toilet and a split toilet?
The main characteristics of the split toilet are high water level, strong impulse, low price, and many styles.
2025-01-09
GET A FREE CONSULTATION
Do you have anyquestions?
We' ll get back to you.
For inquiries about our products, please leave your E-mail and we will be in touch within 24 hours.
Address: Guxiang industry area, guxiang. Chaozhou.Guangdong. China.
Mob/Wechat/Whatsapp:+86-13413723499


Yoyo
Jessica
Website